
A new chastity cage inspection should happen before the first fitting. The useful question at unboxing is whether the delivered parts match the order, have intact contact surfaces, and assemble and release as intended. Trying on a device is a poor way to discover a damaged edge or a binding lock. This off-body checklist is for adults planning consensual use, with an accessible removal method and no pressure to continue through discomfort.
Keep the Unboxing Separate from the First Fitting
Use a clean, well-lit surface with enough room to lay out each component separately. Keep small keys and connectors in a shallow tray. Save the order confirmation and original packaging, and take an overall photograph of the unused set before rearranging parts. Photograph any visible shipping damage as well. This creates a reference if a piece is missing or a finish looks different from the selected variant.
Read the current returns and exchange policy before cleaning, modifying, or trying the device on. The published refund terms require unused items in their original packaging. An inspection does not create a right to return a used item, and a suspected defect should be discussed with the seller before you attempt a remedy. Keep order labels out of photographs you share publicly.
Reconcile the Variant, Dimensions, and Included Parts
Compare against the selected order, not the display photograph
A listing may show several colors, cage lengths, or rings in one gallery. Match the order confirmation to the exact variant received. Count the parts promised for that variant, identify which ring belongs with which cage, and check that the supplied keys correspond to the supplied lock. Do not assume every photographed accessory is included or that components from another model are interchangeable.
For example, the iridescent-finish resin cage listing describes five cage lengths, from S at 56 mm to XXL at 110 mm, and a set with four base-ring sizes: 42, 45, 48, and 52 mm. Those details make a useful order checklist, but they do not tell you where each measurement starts or whether a nominal size includes a connector. Ask for the measuring convention before interpreting a small difference as a manufacturing defect.
Measure without loading or scratching the part
Where the seller supplies a clear measurement method, compare dimensions with a suitable measuring tool without squeezing the part or dragging a sharp edge across it. Note the unit and measurement points. A ring diameter is not a circumference, and a curved cage length may not match a straight end-to-end reading. Do not invent an acceptable tolerance when none is published: record the discrepancy and ask.
Use Construction Details to Decide Where to Look
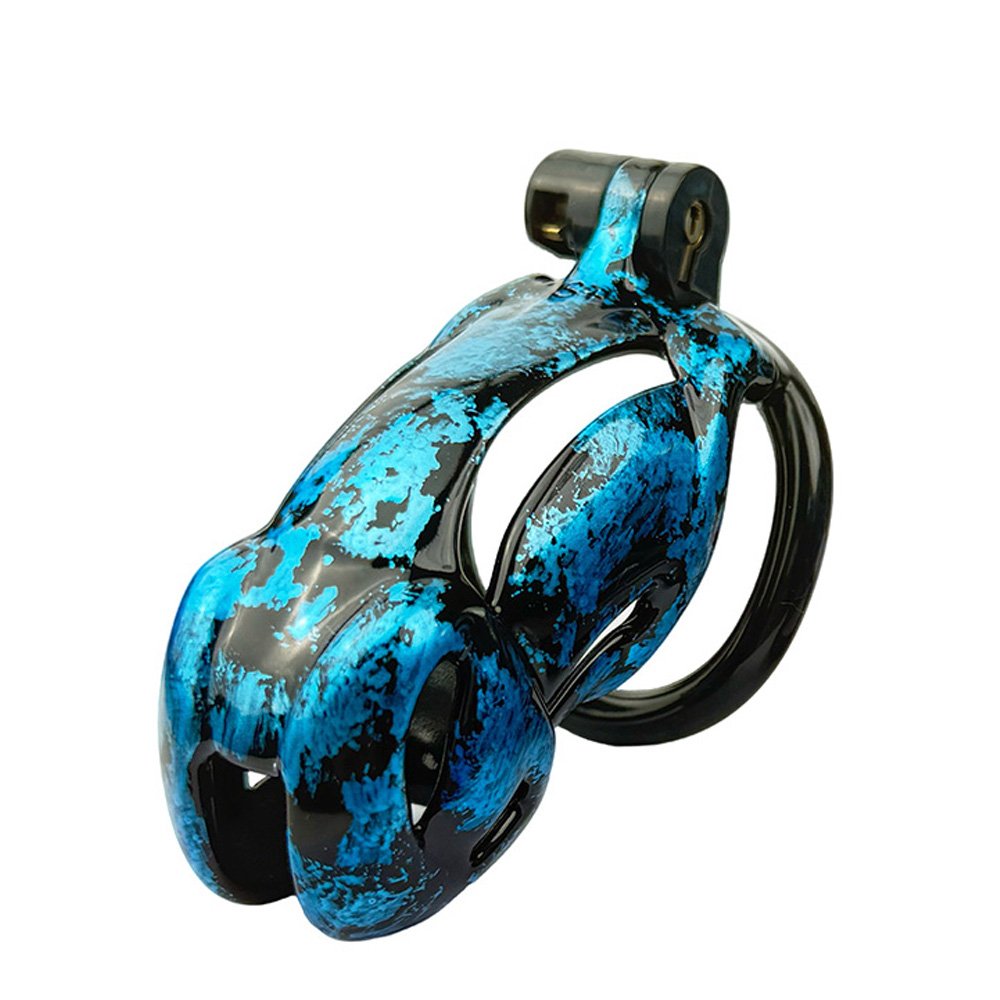
Inspection points change with the design. The flat stainless-steel cage with a perforated shield is described with a floral opening pattern and a hinge structure. Its opening edges, shield perimeter, and moving joint deserve separate attention. The lightweight pink resin cage with a vented base ring is described with a front opening and multiple ring vents, so inspect those recesses as well as the connection. These are catalog construction details, not guarantees about hygiene, comfort, or pinch prevention.
| Construction feature | Where to inspect | Reason to pause |
|---|---|---|
| Perforated metal shield | Opening edges, outer perimeter, hinge, and adjoining contact surfaces | Burrs, sharp damage, misalignment, or a joint that catches during the intended motion |
| Resin shell and vented ring | Vent recesses, narrow sections, connector area, and inside edges | Visible cracks, chips, loose fragments, or a damaged connection |
| Patterned or glossy surface | The same contact areas viewed under different lighting angles | Peeling, lifting, unexpected residue, or a suspected defect hidden by the pattern |
| Lock and supplied keys | Correct assembly, key engagement, and the entire release sequence | Binding, a key that will not operate normally, or parts requiring force to separate |
Distinguish Appearance from Surface Condition
Rotate each unused part slowly under diffuse light, then change the light angle to examine edges and junctions. A bright reflection can hide a small chip; a dark pattern can make a line difficult to interpret. Inspect inside openings and underneath overlapping parts as far as the intended disassembly permits. Do not run bare skin along a suspected sharp edge to test it.
A molding line, print texture, or color variation is not automatically a defect, but a visible crack or lifting surface is a different concern. If you cannot tell whether a line is part of the design, take both an overall photograph and a close view with a scale beside the area. Avoid flexing a rigid part to make a line open up. You are documenting its condition, not performing a destructive strength test.
The word “resin” does not identify a specific formulation, and “stainless steel” alone does not establish the alloy, coating, or suitability for a person with a sensitivity. Gloss does not prove smoothness or biological safety. Request material and care details when these affect your purchase; do not fill gaps with assumptions based on color or weight.
Prove the Assembly and Release Sequence Off the Body
Follow the maker’s intended assembly order with the device resting on the work surface. Parts should meet in the specified orientation without bending, levering, or improvised shims. Keep fingers away from closing gaps. Marketing terms such as “anti-pinch” do not remove the need to observe how the joint moves or where it closes.
Operate the supplied lock and keys through the normal sequence, then confirm that the intended release parts separate again. Test supplied spare keys too, without forcing them. If operation changes when parts are assembled, check the orientation against the instructions; do not compensate with extra pressure. A key that turns only when you push components together hard warrants clarification before use.
Avoid adding oil, filing a connector, or swapping in an apparently similar lock to solve a new-item problem. Such changes can affect surfaces, alignment, and return assessment. This simple function check establishes only that the mechanism operates under the conditions tested. It does not certify reliability under every wearing condition or justify inaccessible keys.
Document a Problem Before Deciding on Repair or Replacement
Send a concise description through iCockCage customer support: the order number, model and selected variant, what you observed, whether the item remains unused, and clear photographs of the complete part and the affected area. For a dimension question, include the measuring points. For a lock problem, describe the assembly step where it binds without repeatedly forcing it for a demonstration.
Keep a suspected damaged item out of use while the issue is resolved. Do not sand a body-contact edge, glue a crack, apply a home coating, or heat a component into alignment. Even a visually neat alteration can change the contact surface or dimensions. Ask for a replacement or a clearly defined manufacturer-approved remedy, including how it affects care and return eligibility.
Move from Inspection to a Separate Fit Decision
If the order and basic function checks pass, clean and dry the device according to its material-specific instructions before any trial. The cleaning and drying guide explains why joints and removable components need attention. Cleaning cannot correct a crack, rough edge, or unreliable lock, and an inspection alone does not establish cleanliness.
Then use the personal size and fit checklist to evaluate the contact points on your body. Keep the first trial brief, awake, and easy to end. Agree on stopping with any partner, retain access to the release method, and remove the device for skin checks. Neither a successful unboxing inspection nor a short comfortable trial establishes an all-day wear limit.
Stop and remove the device promptly for pain, numbness, coldness, unusual discoloration, swelling, or broken skin. Seek urgent medical help if removal is difficult or symptoms are severe or persist. Reassess both fit and product condition before considering further use; continuing through discomfort is not a way to complete an inspection.
FAQ: Inspecting a New Chastity Cage
Should I try on a new chastity cage before inspecting it?
Inspect the unused device off the body first. Verify the order, look for damage, and check the intended assembly and release mechanism before cleaning or trying it on. Review the current return conditions before use.
Does a glossy finish prove that the surface is smooth?
No. Gloss and color describe appearance. Inspect edges, openings, seams, and contact surfaces under changing light; a glossy product image cannot establish the condition of the item you receive.
Can I file down a rough edge or glue a cracked cage?
Do not use filing, sanding, glue, or a home coating to make a damaged body-contact device wearable. These changes can alter dimensions and surfaces. Stop and ask the seller about replacement or an approved remedy.
What if the key only turns when I push the parts together hard?
Do not force the key or test the problem while wearing the device. Confirm the intended assembly off the body and contact the seller if binding remains. A lock that cannot release normally is a reason to stop.
Does passing an inspection mean the cage is safe to wear all day?
No. An inspection checks visible condition and basic operation, not personal fit or a safe wear duration. Any trial should be brief, awake, consensual, and easy to end, with skin checks and an accessible release method.